Quantcast
Channel: flower art – My Flower Journal
Viewing all 30 articles
Browse latest View live

Plein Air Painting In A Garden

0
0
Plein air painting in the garden can be such a pleasant experience. Here are my tips and ideas for a succssful day plein air painting in the garden. myflowerjournal.com

Plein air painting can be a fun and rewarding activity with the right supplies and a little preparation. I recently took a few supplies and went to the Ashton Gardens at Thanksgiving Point in Lehi, Utah and did some watercolor plein air painting. Here are some tips to make your next plein air painting experience a pleasant one.

8 Tips For A Pleasant Plein Air Painting Experience

1. Pack light.

Keep your plein air painting kit small so it is easy to carry wth you in your purse or tote bag.  My kit includes the Koi Watercolor Pocket Field Sketch Box. It comes with a small water brush and I added a medium sized one too. I also have a black sharpie pen, white gel pen, mechanical pencil, clear plastic ruler, eraser, small spray bottle of water to moisten the paints, paper towel and Strathmore Watercolor Postcards. All of this fits in this Travelon packing cube. I love the Sakura Koi Pocket Sketch Kit. When its open you can place a 4×6 watercolor postcard on the open cover and there is tray that is stored inside to mix your paint on. The brush that is included with this set is a water brush. The handle can be filled with water making it possible to paint without a cup of water to rinse your brush in. If you haven’t used a water brush here’s a video tutorial that shows how to use one.

2. Splatter Paint on Postcards. 

I love to add flowers to postcards with splattered acrylic paint. A couple of days before my plein air painting experience I splattered some acrylic paint on some of my Strathmore 4×6 watercolor postcards.  You can learn how I splatter paint here. The flowers in the garden were my inspiration for adding flowers with watercolor to my splattered paint to create an impressionistic  piece of art. This way I didn’t start with a blank piece of paper and have to try and decide what to draw.

3. Dress appropriately.

Dress in comfortable clothes that won’t be damaged if you have to sit on the ground. Most gardens have plenty of benches, but they aren’t always in the shade. I like to sit in the shade so sometimes I find it necessary to sit on the ground to get the view I want and be out of the bright sun.

4.Wear insect repellant.

I forgot to do this and came home with a few bug bites.

5. Paint in a variety of locations.

Work quickly and try different locations and views. There are so many different flowers and themes in gardens its fun to move around and paint more than one scene.

6. Be Prepared for attention.

This is a hard one for me. I would rather paint at home where no one is watching, but its a good experience to get out in nature and paint. People are curious and like to see what you are doing and ask questions. At first this felt awkward, but I just relaxed and took time to visit with people that showed an interest. I met some nice people and enjoyed exchanging ideas with them.

7. Not every piece will be a masterpiece.

If you don’t like the postcard your working on start over. Its only paper. You can use the back as a piece of scrap paper to test colors. Move to a new spot if necessary.

8. Know when to stop.

After a couple of hours take a break or finish and go home. Quit before you get too tired or hungry. Its good to finish your plein air painting experience with a piece you are happy with. Once I’m tired or hungry its not as much fun. I have to remind myself I can come back and do it another day!

Happy Painting!

You can see more splattered paint flower postcards ideas here and here.

Here’s a great


This post contains affiliate links for products I love and use.

The post Plein Air Painting In A Garden appeared first on My Flower Journal.


Desert Cactus and Splattered Paint Flower Art

0
0
https://www.myflowerjournal.com/plein-air-painting-in-a-garden/

My inspiration to paint desert cactus and splattered paint flower art cards came from a recent trip to Arizona to visit our daughter and her family. The March weather was beautiful so we spent most of our time outdoors. Every where we went there were cactus and succulents. Some were starting to bloom. After spending the morning at the Desert Botanical Garden I couldn’t wait to get my paints out and try adding cactus to some splattered paint cards I brought with me.

When I travel I like to bring a little on the go paint kit with me. I usually include some watercolor postcards that already have acrylic paint splattered on them. It makes a nice easy on the go project. I like to splatter a lot of cards at the same time so I have some ready for travel or times I feel like painting, but don’t want to splatter. I splatter paint on a variety of sizes: 6×6, 4×6 or 5×7 or even scraps I can use for gift cards. This time the cards I used were 5×7 inches.  *If you aren’t familiar with how I splatter acrylic paint and turn it into flower art go here. You will find a video and lots of FAQ and helpful info.

Supplies:

Sakura Koi Watercolor Field Kit and the brush that comes with it, 5×7 watercolor paper, , white paint marker, mechanical pencil, eraser, paper towel.

Steps To Add Desert Cactus and Splattered Paint Flower art.

  1. Add a light pencil sketch of cactus on your watercolor paper that has been splattered wth acrylic paint. Make sure the acrylic paint has had a chance to dry. You can use the photos I have included below as reference.
  2. Paint the cactus using a variety of greens. Start to add the flowers.
  3. Keep adding more flowers and foliage. Darken some of the cactus pads as needed to give variety. Add sky color and a few watercolor splatters while the sky is damp.
  4. When the watercolor is dry use your mechanical pencil to outline a few of the cactus and add some texture to them. Last of all use a white paint pen or white gel pen to add a few dots or needles to the cactus.


Finished 5×7 Desert Cactus and Splattered Paint Flower Art.

Desert Cactus Inspiration Photos

Here are some photos I took at the Desert Botanical Garden in Phoenix AZ. You can use them for inspiration as you paint your own Desert Cactus and Splattered Paint Flower Art. I bought this book, Guess Who’s In The Desert, while we were at the Desert Botanical Gardens. I love the illustrations and my grandkids like reading the clues and guessing which animal will be on the next page. Fun book!

Need help drawing cactus and flowers?

I really like this book from Peggy Dean: Botanical Line Drawing.


This post contains affiliate links for the products I used to create this art.


The post Desert Cactus and Splattered Paint Flower Art appeared first on My Flower Journal.

Add Embroidered Flowers To Splattered Paint

0
0
How to add embroidered flowers to splattered acrylic paint from myflowerjournal.com

Its interesting how different things can trigger a new idea. I recently saw an embroidery book and it gave me the idea to add embroidered flowers to splattered acrylic paint. I used to enjoy doing embroidery, but had put that hobby aside as I pursued other interests. It hadn’t occurred to me to combine it with splattered paint until I saw a book by Kazuko Aoki.

Inspiration

When I saw  the cover of “The Embroidered Garden” by Kazuko Aoki it reminded me of my splattered paint flower art. I wondered if it would work to add embroidered flowers to splattered acrylic paint. It did! My embroidery skills aren’t quite as exquisite as Kazuko Aoki’s but I am happy with my finished piece.

My Process:

  1. Starch a piece of good quality muslin or cotton fabric. Cut it larger than the finished size you desire.
  2. Cover your fabric with a piece of paper that has an opening cut out the size you want your embroidered design. Tape it in place so it won’t move.
  3. Splatter acrylic paint using the methods outlined here.
  4. After the paint dries remove the paper and place your fabric in a hoop centering your splattered paint design.
  5. Start adding embroidered flowers and leaves in a random natural pattern. I used three strands of DMC floss for my flowers. On some flowers I used two strands of a color combined with one strand of a lighter or darker shade of the color to give it some depth.The Art of of Whimsical Stitching and Embroidery Pocket Guide, are a good resource along with The Embroidered Garden. 

    My Finished Embroidered and Splattered Paint Flower Art!


This post contains some affiliate links for products I love and use to create my art.

The post Add Embroidered Flowers To Splattered Paint appeared first on My Flower Journal.

My Botanical Line Drawings and Doodles

0
0
After working my way through Peggy's book I decided to try some botanical doodles. myflowerjournal.com

Creating botanical line drawings and doodles is a new favorite hobby for me. I have loved working my way through Peggy Dean’s Botanical Line Drawing Book. It has helped me explore new flowers, leaves and other botanicals that I can draw and add to my art. This book makes it very simple to learn how to do botanical line drawings and turn them into doodles and other flower art.

Practice Botanical Line Drawings 

The Botanical Line Drawing book is set up so you can practice right in the book. It has step by step drawings for each plant and a box at the bottom where you can practice drawing the leaf, flower, cactus or succulent shown in the steps above. There is plenty of white space where you can continue to practice. I challenged myself to do one or two pages a day. Sometimes I was having so much fun I just kept going. You can see my drawings in the “draw it” box on the pages below. (Here’s a new edition of Botanical Line Drawing.)


Botanical Doodles

After working my way through Peggy’s book I decided to try some botanical line drawings in a doodle style. I really like the simplicity of working with a piece of paper and a black pen to create flower art. It feels good to just use two simple supplies to be creative. Here are some of my botanical line drawings and doodles. For the doodle above I did just leaves . I love flowers and use them in almost all my art. For this doodle I challenged myself to do something without flowers.

Background Doodles

I find my botanical doodles look more complete when I added some small designs in the negative spaces. It makes them look fuller and gives them more movement and life. Here are some background doodles I like to use.


Have fun creating your own botanical line drawings and doodles!


Learn about my Watercolor Flower Doodles on Splattered Paint.

This post contains affiliate links for products I love and and use.

The post My Botanical Line Drawings and Doodles appeared first on My Flower Journal.

Discover Mint Tin Oil Painting

0
0
This butterfly mint tin oil painting is a quick and easy project! Learn more on myflowerjournal.com

I recently discovered how fun it can be to do a mint tin oil painting. It is a great way to practice your oil painting skills and create a little piece of art in a short amount of time. Keep it simple so you don’t get discouraged working on such a small surface.

The first Altoid tin oil painting I saw was done by Heidi Annalise. She has some great tips on her website that I used to get started. I also follow Ashley at Mint Tin Adventures on instagram.

My First Little Painting:

This butterfly mint tin oil painting is a quick and easy project! Learn more on myflowerjournal.com

How I painted my second mint tin painting:

When I painted my second butterfly painting I took some progress shots to show how I did it. First I bought some Altoids and dumped out the mints. I washed the tin and put a small stuck a piece of gray palette paper in the bottom with double stick tape.

I covered a 2×3 inch board with 2 coats of gesso. When the gesso was dry I drew my design in pencil using a reference photo I took at the Butterfly Biosphere near our home. I attached the board to the lid of the tin with a mounting square. You could also use a piece of masking tape.

I first painted the butterfly a dark color. Then I added the details of the butterfly working from dark to light building up layers of color. I used two short handled brushes that Ashley with Mint Tin Adventures recommended. You can find them here and here. The last step was to add the background using some of the colors used in the butterfly mixed with white.

This is how I did my butterfly oil painting using a mint tin for the pallette. myflowerjournal.com

Display your little painting:

You can leave your painting in the mint tin with the paints you used and let it dry and display it that way. Or when the painting is dry put it in a small frame. Mount it on top of the glass or mat board using a sticky square so you don’t lose any of the painting behind the frame. The 2×3 inch board fits perfect inside the opening of a 2.5 x 3.5 frame.

2×3 inch oil painting mounted inside a 3×4 frame

You can see more of my tutorials on this page.

Learn about some of my favorite supplies here.

As an Amazon Associate I earn from qualifying purchases. Many posts on my site contain Amazon affiliate links. I only share products I use and like. I make a small commission if you make a purchase through these links. I helps keep My Flower Journal running at no extra cost to you!

The post Discover Mint Tin Oil Painting appeared first on My Flower Journal.

Paint Splatters With Flowers All Over

0
0
How to add watercolor flowers to paint splatters to create splattered paint flower art-myflowerjournal.com

Something New!

I tried something new a few weeks ago and it worked! I loaded a brush with acrylic craft paint and splattered it all over mixed media paper in lots of different directions. When the paint dried I added watercolor flowers. I love this new way to create splattered paint flower art! It has so many possibilities and it doesn’t matter if you have long paint splatters or little specks. It all works!

Paint Splatters

Start with piece of mixed media or watercolor paper . You can add masking tape or blue painters tape if you like a nice white border for your finished art. Next splatter acrylic paint in lots of different directions. You can learn more about my splattered paint art, the brush I use and watch of short video of me splattering paint here.

Watercolor Flowers

After the acrylic paint dries its time to have fun and start adding flowers. You can pull ideas from your head or look at photos to get started. I have nice collection of flower photos from vacations and outings close to home I often refer to. I like to use Daniel Smith Watercolors or this Koi set by Sakura. Keep adding flowers and leaves until you feel like your flower art is finished.

6×6 mixed media paper with watercolor flowers and splattered acrylic paint

Why I Love Paint Splatters!

Sometimes when I look at a piece of blank watercolor paper I can’t decide where to start or what to paint. Acrylic paint splatters give me something to start with. It also helps me to let go and be creative filling the spaces between the splatters with flowers and color.

6×6 mixed media paper with watercolor flowers on splattered acrylic paint

On this last design I got brave at the end and filled in around the flowers with some color!  If you do add color to the background make sure the flowers are dry so the color doesn’t bleed.

Happy Splattering!

As an Amazon Associate I earn from qualifying purchases. Many posts on my site contain Amazon affiliate links. I only share products I use and like. I make a small commission if you make a purchase through these links. I helps keep My Flower Journal running at no extra cost to you!

The post Paint Splatters With Flowers All Over appeared first on My Flower Journal.

Painting Watercolor On Gesso On Old Book Pages

0
0
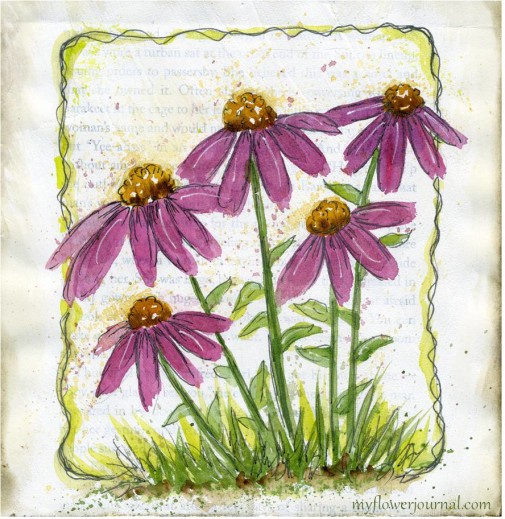
Purple Cone Flowers in Watercolor on Gesso on Old Book Pages-myflowerjournal.com

Did you know you can paint with watercolor on gesso? I learned something new in an online class I took. You can spread gesso on old book pages then paint on it . I have used gesso many times for multi-media projects, but I din’t know you could paint with watercolor on it. What a great thing! I love the texture and look of the book print under the gesso with a watercolor over it.

When you purchase through links on this site we may earn a commission at no extra cost to you. This helps us provide free content for you to enjoy.

I was surprised the pages dried flat after brushing the gesso on them. I suggest you spread gesso on a bunch of old book pages. That way you have plenty to create with. I used a sponge brush to apply the gesso. Make sure you do it thick enough for a good base to paint on, but thin enough for some of the book print to show through. I did a variety of  book pages that were different sizes and colors. 

After the gesso is completely dry I lightly draw my sketch with pencil. Then I go over the pencil with a black waterproof pen. Next I carefully erase the pencil if it shows. You can’t erase very hard or you will damage your gesso surface. Watercolor as you usually would. When its dry I usually add a few more pen details and some splattered paint in watercolor or acrylic. Splattered acrylic paint is much heavier and gives the look of a grassy field. Splattered watercolor is just little specks and dries quite light unless you use a lot of pigment mixed with the water.

Here’s a watercolor I painted on gesso spread on old book pages.

Pumpkin watercolor before the splattered paint….

I splattered dark green and brown acrylic paint first, then a variety of lighter greens followed by orange, yellow and white.

Watercolor pumpkins in a field of splattered acrylic paint.

Take a look at my new website!

In August 2020 I started reading online to my grandchildren, who live hundreds of miles away. A few years and over a thousand books later we are still reading together on FaceTime. I created readaloudgrandma.com to help other grandparents that want to have a rewarding experience reading aloud to children they love!

www.readaloudgrandma.com

The post Painting Watercolor On Gesso On Old Book Pages appeared first on My Flower Journal.

Watercolor Hearts and Roses

0
0
Painting Hearts and Roses Tutorial-myflowerjournal

Watercolor hearts and roses can be combined to make a beautiful design. I have always loved to paint watercolor flower wreaths. They look especially pretty with roses as the focus flower. Roses aren’t hard to paint if you follow a few simple steps.

When you purchase through links on this site we may earn a commission at no extra cost to you. This helps us provide free content for you to enjoy.

How to paint a watercolor rose and heart shaped wreath

Supplies:

Watercolor Paper, **Watercolors, watercolor brush or waterbrush, pencil, black pen, heart cookie cutter (optional)

Watercolors: I use the Daniel Smith Essentials Set (a limited palette) plus a few favorite colors for most of my watercolor projects, but there are times when its nice to use premixed colors like the ones found in the Koi Watercolor set.

Steps to Follow

1. Lightly draw a heart in pencil on watercolor paper.

2.   Place light marks in pink or red for roses. Leave lots of white.

3.   Add yellow green dabs of paint around the roses. Don’t touch the pink. Leave white space.

4.   Add dabs of purple or blue color for small flowers or berries.

5.   Add a darker pink layer to roses. Leave white space.

6.   Add darker green leaf shapes and dabs. Leave some of the yellow green showing.

7.   Soften edges of roses with a light pink wash in a few places. 

8.   Darken center of roses and any other areas.

9.   Darken green and purples or blues if needed.

You don’t need to paint as many roses for a simple wreath like this.
You can add some pen details when you finish and background color if you want.

How to paint a heart filled with roses

Inspiration

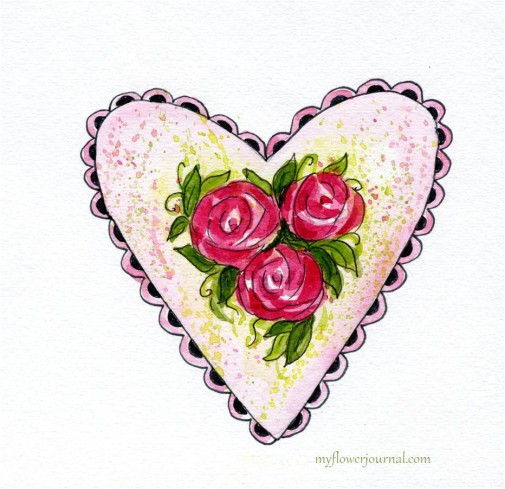
Inspired by this photo of roses I took at Costco some time ago I painted a watercolor heart full of roses.

To make the heart filled with roses first I cut a heart out of scrap paper and traced around it lightly with pencil. You could also trace a heart cookie cutter.

Next I filled it with simple roses like the ones in the tutorial above. Make sure you leave some white space in and around the roses. Then add some light green leaves. To finish add dark strokes to the roses and darker green leaves. It can be a finished piece of art like this or you can add some pen detail with a fine tip permanent black pen and paint splatters.

Another idea for a watercolor heart with roses

Using the rose tutorial above you can create a variety of rose themed art. To create the piece below I drew the heart with pencil and added the border. Next I outlined it in with a fine tip permanent black pen. Next I added a light pink wash leaving the center of the heart almost white. Paint three roses following the example above. Finish by adding some green leaves and detail with a fine tip permament black pen.

Do you like to add pen to your watercolor?

You can make wreaths in a variety of shapes like this example above. I added some pen detail to part of this wreath so you can see the difference it makes. I like it both ways. It just depends on the look you like. These wreaths look beautiful framed or on a card.

You can find more ideas for watercolor flower cards here and watercolor Christmas wreaths here.


Take a look at my new website!

In August 2020 I started reading online to my grandchildren, who live hundreds of miles away. A few years and over a thousand books later we are still reading together on FaceTime. I created readaloudgrandma.com to help other grandparents that want to have a rewarding experience reading aloud to children they love!

www.readaloudgrandma.com

The post Watercolor Hearts and Roses appeared first on My Flower Journal.

Splatter Painting At A Different Angle

0
0
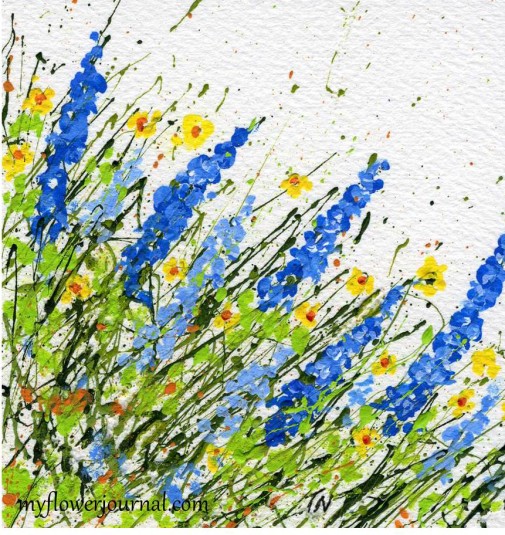
A Differnet Angle on Splatter Painting-myflowerjournal

Your splatter painting will take on a whole new look if you turn your paper and try splattering at a different angle. I think this direction looks best when you are working on a square background. I’ve used the same techniques shown in earlier posts. The brush and paints I use and a video showing how I splatter paint can be found here with some FAQ.

When you purchase through links on this site we may earn a commission at no extra cost to you. This helps us provide free content for you to enjoy.

Try splattering your paint at an angle

Splatters All Over

You can also randomly splatter your paint all over your paper. Then add flowers, leaves and a background color if you desire. I like to do a border of masking tape around the area to be splattered to give a nice white border. This may be the easiest way to do splatter paint flower art!

More splatter paint ideas can be found here.

Learn how I splatter my paint to create my flower art.

Take a look at my new website!

In August 2020 I started reading online to my grandchildren, who live hundreds of miles away. A few years and over a thousand books later we are still reading together on FaceTime. I created readaloudgrandma.com to help other grandparents that want to have a rewarding experience reading aloud to children they love!

www.readaloudgrandma.com

The post Splatter Painting At A Different Angle appeared first on My Flower Journal.
Daffodil Doodles In 4 Easy Steps

0
0
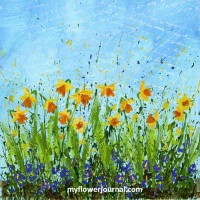
You can create this beautiful Daffodil Splattered Paint Flower Art using the easy 4 step daffodil doodle tutorial from myflowerjournal

Daffodil Doodles are easy to paint in watercolor or acrylic if you follow these 4 easy steps. You can use your daffodil doodles to make cards, journal page borders or framed splattered paint art.

When you purchase through links on this site we may earn a commission at no extra cost to you. This helps us provide free content for you to enjoy.

Daffodil Doodles Easy 4 Step Tutorial

  1. Using watercolor or acrylic paint choose a  darker yellow or orange to paint the center of the daffodil. Most daffodils look slightly down or straight out-not up. Refer to my example above to copy the shape. Keep the bottom edge uneven to give it a more natural look. Vary the direction the center part of the flower faces. You can do a few that look like they are facing forward making a circle shape for the center.
  2. Add a few lighter yellow petals to the back and sides of the center you painted.
  3. Add the stem. If you look at a daffodil example above or my inspiration photo below you can see that the stems come out straight out from the back of the flower then bend and go straight down. Painting the stem this way helps identify it as a daffodil.
  4. Last I added some leaves and a few dabs of purple paint to look like pansies, dabs of brown for dirt and a few paint splatters in yellow and purple.

I used these 4 steps to create daffodils in watercolor and acrylic paint, but you could do the same thing with brush markers. I did not draw anything with pencil first. I did all of the daffodil doodles with a brush and paint. They were quick and easy to make and would make great cards, gift tags, journal borders or framed art.

Daffodil inspiration photo

My husband and I were recently in Salt Lake City and visited the beautiful gardens at Temple Square. There were lots of daffodils blooming surrounded by purple pansies. This is one of the many photos I took that day and the inspiration for my daffodil doodles. Often when I create my splattered paint flower art I paint random flower shapes in a variety of colors. As I looked at this photo I decided to try a splatter painting with daffodils as the main flower accented with purple pansies.

Splattered Paint Flower Art With Daffodil Doodles

I started with a 6×6 ampersand gesso board and painted the sky then splattered the green and let it dry. You can read more about my process and the paints and brush I use here. After it was dry I painted the daffodils using the 4 steps outlined above. I added stems with the bend characteristic of daffodils. Then I brushed on more leaves and added dabs of purple paint for the pansies and few little yellow centers. I also added a little brown for the dirt. To finish I splattered some yellow then purple paint.

One more watercolor daffodil painting on spattered acrylic paint

Take a look at my new website!

In August 2020 I started reading online to my grandchildren, who live hundreds of miles away. A few years and over a thousand books later we are still reading together on FaceTime. I created readaloudgrandma.com to help other grandparents that want to have a rewarding experience reading aloud to children they love!

www.readaloudgrandma.com

The post Daffodil Doodles In 4 Easy Steps appeared first on My Flower Journal.
Viewing all 30 articles
Browse latest View live


Latest Images