Quantcast
Channel: flower art – My Flower Journal
Viewing all 30 articles
Browse latest View live

A Published Tutorial: Turn Paint Splatters Into Flowers

$
0
0

Learn how I turn paint splatters into flower art in  the 2014 July/August issue of the Cloth Paper Scissors Magazine.  You will find lots of inspiration in this issue for summer art projects including ideas from two of my favorite artists: Joanne Sharpe and Jacqueline Newbold.You can get a digital edition here or a paper copy at Barnes and Noble, Joann’s, or other places that carry art and craft magazines. I hope you are having a great summer and finding the time to exercise your creativity and make something beautiful!

Learn how I turn paint splatters into flower art in  the 2014 July/August issue of the Cloth Paper Scissors Magazine. myflowerjournal.com

You can see the full article on Cloth Paper Scissors blog here.

The post A Published Tutorial: Turn Paint Splatters Into Flowers appeared first on My Flower Journal.


Simple Splatter Paint Idea

$
0
0

I love the look of chalk art! Its simple, but striking! I decided to try and create the same look splattering white paint on a black background. You could even splatter on a a chalkboard. This simple splatter paint idea looks great with little effort and only one color of paint. If you don’t want to invest in a lot of paint colors this would be a good way to start splattering paint. I used the same techniques I’ve used in my other splattered paint art.

Simple imitation chalk art Splatter Paint  Flowers-myflowerjournal.com


Simple Black and White Splatter Paint Idea-myflowerjournal.com


Melissa at Let’s Paint 101 made a great video showing splatter paint techniques.

Shared on Art Journal Every Day

The post Simple Splatter Paint Idea appeared first on My Flower Journal.

Splatter Painting At A Different Angle

$
0
0

Your splatter painting will take on a whole new look if you turn your paper and try splattering at a different angle. I think this direction looks best when you are working on a square background. I’ve used the same techniques shown in earlier posts.
Splatter Painting from a different angle-myflowerjournal


Try a different angle splatter when splatter painting-myflowerjournal.com

A Differnet Angle on Splatter Painting-myflowerjournal Snow Flower Art created with white acrylic paint splattered on craft paper with glitter added-myflowerjournal.com

On this piece.I call Snow Flower,  I sprinkled some glitter on before the paint dried. It looks pink in the photo,but I used a clear iridescent glitter. I wanted to give it the look of fresh snow glittering in the sun.

Two more ideas are found here and here.

The post Splatter Painting At A Different Angle appeared first on My Flower Journal.

Inspirational Quotes On Beautiful Backgrounds

$
0
0

I’m always on the watch for inspirational quotes to add to my growing collection. Recently I started using two apps on my ipad to edit and embellish my photos. I have fun turning them into beautiful backgrounds and adding favorite quotes.Here are some inspirational quotes on beautiful backgrounds I created using my own flower photos and apps on my ipad. You are welcome to download them for your own personal use. If you use them please give me credit by including my name and  linking back to my web site. You can see more inspirational quotes on my instagram feed. An Inspirational Quote on a beautiful background created on my ipad from my own flower photo and favorite apps-myflowerjournal.com Favorite inspirational quote on a flower background created on my ipad from my own photo and favorite apps-myflowerjournal.com Inspirational Quotes on Beautiful backgrounds created on my ipad from my own photos and favorite apps-myflowerjournal.com Inspirational Quotes on Beautiful backgrounds created on my ipad from my own flower photos and favorite apps-myflowerjournal.com

The apps I like to use are Rhonna Designs and Waterlogue. When you open the Waterlogue app  select a photo from your camera roll. Then watch it draw and paint your photo in watercolor. Its amazing and very simple. In a mater of seconds you can have a beautiful watercolor picture. In Rhonna Designs I can crop the photo, add text and embellish my photos with fun graphics. Rhonna has some great tutorials on her website. She shows you all the creative things you can do with her app. I like to combine both of these apps making a watercolor image first, saving it to my camera roll then adding text and graphic elements  in Rhonna Designs. Here are some before during and after photos to help you understand the process. How to create Inspirational Quotes on beautiful backgrounds using favorite apps on my ipad to edit my own photos-myflowerjournal.com

The post Inspirational Quotes On Beautiful Backgrounds appeared first on My Flower Journal.

A Fun Summer Art Activity

$
0
0

Are you looking for a fun summer art activity? Grab some index cards and a few art supplies and join me and hundreds of others who are participating in the Daisy Yellow Art Index Card A Day Challenge. It officially starts on June 1, 2015, but if you are anxious like me there are some warm up exercises you can do. The idea is to do something creative on a 3×5 index card every day for 61 days. There will be prompts for children and adults.  I’ve been gathering my supplies and trying some new things. I decide to experiment with my Tombow Markers. I found I can make beautiful backgrounds by coloring the index cards with the Tombow Markers, mist them with water and let them dry. I think you could use this technique with any water soluble marker.The cards curl up when they are wet, but flatten as they dry.  Here are some practice cards I created with step by step photos. Playing with my Tombow markers and acrylic paint getting ready for the Index Card A Day challenge-a fun summer art activity-myflowerjournal.com Tombow Markers spayed with water for background with flower doodles on top -a fun summer art activity-myflowerjournal.com Step by step Tombow Markers spayed with water for background with flower doodles on top for a fun summer art activity-myflowerjournal.com

After it was dry I did some flower doodles with a white Sharpie Paint Pen. Splattered Acrylic paint foliage with flowers created with Tombow Markers sprayed with water for a fun summerart activity-myflowerjournal

For this one I started by splattering green acrylic paint on the card. After the splattered paint was dry I added the flowers with the Tombow Markers then sprayed them with water and let them dry. (Splatter Paint Tutorial) Step by Step Splattered Acrylic paint with flowers created with Tombow Markers sprayed with water for a fun summer art activity-myflowerjournal.com

Here is one more done the same way. Splattered Acrylic paint foliage with flowers created with Tombow Markers sprayed with water for a fun summer art activity-myflowerjournal

Tombow Markers sprayed with water to give them a softer look. I used this design for my title card for the Index Card A Day Challenge-a fun summer art activiity-myflowerjournal.com   My title card created with Tombow markers for the Index Card A Day Challenge-a fun summer art activity-myflowerjournal.com        I used my sewing machine to add a title banner and some stitches for texture.


I will be sharing this on Paint Party Friday, Art Journal Every Day, French Country Cottage

The post A Fun Summer Art Activity appeared first on My Flower Journal.

FAQ to Create Splattered Paint Flower Art

$
0
0

Two years ago I shared my first post on how to create splattered paint flower art. It continues to be my most popular post and bring lots of traffic to my blog each day. Thank you for all your kind comments and the questions you have asked the past couple of years.  I get asked some questions frequently. I thought I would share some of these today and hopefully make it easier for you to create your own splattered paint flower art.

Create a splattered paint flower garden-no drawing required-myflowerjournal.com (2) What kind of brush do I use? I use a size 8 round brush (700R-8) I purchased at Hobby Lobby. It is an oil and acrylic brush in the Master’s Touch Series. I have a couple of them and they are both looking a little worn out, but continue to work great.

FAQ to create splattered paint flower art-use a size 8 round brush-myflowerjournal.com FAQ to create Splattered Paint Flower Art-the brush I use-myflowerjournal.com How do I create the long grass like splatters?  I think the paint you choose makes the biggest difference. It does not work to use acrylic paint from a tube. Acrylic craft paint works the best. If it is getting a little old and a little thick it won’t work as well. Here is some of the paint I am currently using to make my green splatters. I use a variety of greens, but these are two of my favorite colors.  FAQ to create splattered paint flower art-my favorite green colors-myflowerjournal.com       I had my daughter video my doing some paint splatters. It is a very short simple video (no sound), but will help you see how I splatter the paint. It also shows how I keep the splatters from getting all over my work area. I have some tips for easy clean up here .

I keep finding more ways to use my splattered paint flower art. Some the ideas I’ve shared are shown below. Splatter Painting from a different angle-myflowerjournal Splatter Painting From a Different Angle Splattered Paint Flower Garden Cards-myflowerjournal (1)

Splattered Paint Flower Cards

Splattered Paint Flower Art Ideas -Sunset-myflowerjournal.com More spattered paint ideas and tips. Splattered Paint Background with wildflowers added with markers-myflowerjournal

Splattered Paint Flowers using markers. Winter Wondrland Watercolor with Splattered Acylic Paint-myflowerjournal Winter Splattered Paint Art


The post FAQ to Create Splattered Paint Flower Art appeared first on My Flower Journal.

Forget-Me-Not Flower Art and Quote

$
0
0

While we were visiting Alaska a few months ago I learned that Alaska’s state flower is the Forget-Me-Not. This beautiful flower symbolizes enduring love. In 15th-century Germany, it was said that whoever wore the little flower would not be forgotten by their lovers. Legend has it that in medieval times, a knight and his lady were walking near the side of a river. He picked a bouquet of flowers for his love, but because of his heavy armor he fell into the river. As he was drowning he threw the flowers to his lady and shouted “Forget-me-not.” Inspired by this small blue flower I created a watercolor flower wreath and a splattered paint garden scene. Both of these projects are easy to do and don’t require any drawing skills. I also have a beautiful quote to share with you. Forget Me Not Flower Art-Watercolor Flower Wreath-myflowerjournal.com

You can follow a step by step tutorial to create a watercolor flower wreath here.

Forget Me Not Splattered Paint Flower Art-myflowerjournal.com

I share lots of splatter paint flower art and tutorials here.

Forget Me Not Flower Quote-myflowerjournal.com   You can read more about Dieter F. Uchtdorf and where this inspiring quote came from here.

Shared on Savvy Southern Style

The post Forget-Me-Not Flower Art and Quote appeared first on My Flower Journal.

How To Create Flower Heart Art With Splattered Paint

$
0
0
How To Create Flower Heart Art with Splattered Acrylic Paint-myflowerjournal

I am always looking for new ways to use splattered paint to create art. With Valentines Day less than a month away I added some flower hearts to paint I splattered on a gesso board.I started with a 6×6 inch Ampersand Gessobord. I painted the background with Golden Acrylic Teal mixed with lots of white. Then using a size 8 round brush load your brush with lots of green paint. It needs to be round brush with stiff bristles for best results. I have tried many different brushes for splatter painting and this is the one that works best! Use plenty of paint. A brush filled with lots of paint produces the long grass like splatters, with less paint you get fine speckled splatters.  I used Martha Stewart Satin paint in Green Olive and Seaweed. Here’s a video showing how I splatter.

After the green splatters dried I used intense, bright colored acrylic paints to make the flowers. That way I can mix them with white to get different shades. I used a size 2 round brush for all the flowers. The heart flowers are two strokes with the round brush to make a “V” or heart shape. The purple flowers were created with little dabs of paint. After the flowers dried I put a watery bright green paint in a few places and finished with a few splatters of pink and purple with the size 8 brush. You can read more about the paint colors I use here.You can follow the same steps and create splattered flower heart art on journal pages, gift tags or cards.

You can see more splattered paint flower art here.

FAQ about Splattered Paint Flower Art here.

Tips for easy clean up here.

Free Printable to create your own heart flower art here.

I will be sharing this on Feathered Nest, Inspiration Gallery, Romantic Home, Paint Party Friday, Savvy Southern Style. A Stroll Thru Life, StoneGable

The post How To Create Flower Heart Art With Splattered Paint appeared first on My Flower Journal.


Free Printable For Splattered Paint Flower Art

$
0
0
Free Printable For Splattered Paint Flower Art

I have a free printable to share with you.  I splattered some paint, scanned it, then created a printable image.  You can download and print it then add flowers with markers or paints to create cards, gift tags, valentines, framed art or add to an art journal. Below you’ll see examples of how to use it and get access to the printable.

I printed these samples on 110lb white card stock on my printer. The image is 6×6 inches. You can re-size it or crop it to fit your needs. Inspired by the post I did last week I added heart shaped flowers. Heart shaped flowers are very easy to add with markers or watercolors. With this printable (click here to download) you or your children could make unique and original valentine cards or gift tags for treats. I hope yours turn out as well as mine. All printers seem to print a little different. My printer is not an expensive one, but I was happy with how the image looked after I printed it.Adding heart shaped flowers with your favorite makers is quick and easy. I love my Faber-Castell Brush Pens. This set of 24 has beautiful colors to choose from and the ink is waterproof if I want to combine them with watercolors.

For this one I wanted to add some larkspur or delphinium type flowers. Watercolor works well to make these flowers. I used my Koi watercolor set. I have had this set for years and love its small size with plenty of room for mixing colors. Over time I have replaced some of the colors with my favorite watercolors from a tube, but this set as it comes is a great set to use for small projects. I used a waterbrush to paint the hearts and add dabs of purple for the other flowers. I also added a bright yellow green I mixed to the background.

Now it’s your turn to have fun! Get your free printable by clicking here.

You can see more of my splattered paint flower art here.

I will be sharing this on Feathered Nest, Inspiration Gallery, Romantic Home, Paint Party Friday, Savvy Southern Style. A Stroll Thru Life, StoneGable Tweak It Tuesday

The post Free Printable For Splattered Paint Flower Art appeared first on My Flower Journal.

Splattered Paint Flower Art Using Golden Fluid Acrylics

$
0
0
Splattered Paint Flower Art done created Golden Fluid Acrylics-myflowerjournal

The Splattered Paint Flower Art I’m sharing today was all created with Golden Fluid Acrylics. A question I am asked often is what type of acrylic paint I use. I have used a lot of different brands of acrylic paints over the years for my splattered paint flower art. Sometimes I use a variety of brands in one painting. The most important thing to look for is a fluid acrylic paint, not acrylic paint in a tube.

Why I like Golden Fluid Acrylics

Golden Fluid Acrylic paint is the most expensive brand I use. Other less expensive brands work as well, but Golden’s intense colors can’t compare to most other brands. The three splattered paint flower art pieces in this post were made with the Golden Fluid Acrylics.  I painted them on gesso board or watercolor postcards.

I use the colors in this basic set and Ultramarine Blue,  Cobalt Teal, Sap GreenGreen Gold, Dioxazine Purple, Raw Umber.  With these colors I can mix most colors I need for my flower art.

How To Make Splattered Paint Flower art


After I paint the sky and ground color I splatter green paint with a size 8 round brush. You can watch a video and learn more about how I do this here. After the paint has dried I add dabs of flower colors to create a variety of flowers. If I have splatters I don’t like I can cover them with flowers.  I keep adding flowers and sometimes more greens and a few splatters in the flower colors. After it dried for a day I sprayed it with Golden Matte Varnish to protect it.

I will be sharing this on Feathered Nest, Inspiration Gallery, Romantic Home, Paint Party Friday, Savvy Southern Style. A Stroll Thru Life, StoneGable, Cozy Little House

The post Splattered Paint Flower Art Using Golden Fluid Acrylics appeared first on My Flower Journal.

Daffodil Doodles In 4 Easy Steps

$
0
0
You can create this beautiful Daffodil Splattered Paint Flower Art using the easy 4 step daffodil doodle tutorial from myflowerjournal

Daffodil Doodles are easy to paint in watercolor or acrylic if you follow these 4 easy steps. You can use your daffodil doodles to make cards, journal page borders or framed splattered paint art.

Daffodil Doodles Easy 4 Step Tutorial

  1. Using watercolor or acrylic paint choose a  darker yellow or orange to paint the center of the daffodil. Most daffodils look slightly down or straight out-not up. Refer to my example above to copy the shape. Keep the bottom edge uneven to give it a more natural look. Vary the direction the center part of the flower faces. You can do a few that look like they are facing forward making a circle shape for the center.
  2. Add a few lighter yellow petals to the back and sides of the center you painted.
  3. Add the stem. If you look at a daffodil example above or my inspiration photo below you can see that the stems come out straight out from the back of the flower then bend and go straight down. Painting the stem this way helps identify it as a daffodil.
  4. Last I added some leaves and a few dabs of purple paint to look like pansies, dabs of brown for dirt and a few paint splatters in yellow and purple.

I used these 4 steps to create daffodils in watercolor and acrylic paint, but you could do the same thing with brush markers. I did not draw anything with pencil first. I did all of the daffodil doodles with a brush and paint. They were quick and easy to make and would make great cards, gift tags, journal borders or framed art.

Inspiration Photo I Took In The Gardens At Temple Square in Salt Lake City

My husband and I were recently in Salt Lake City and visited the beautiful gardens at Temple Square. There were lots of daffodils blooming surrounded by purple pansies. This is one of the many photos I took that day and the inspiration for my daffodil doodles. Often when I create my splattered paint flower art I paint random flower shapes in a variety of colors. As I looked at this photo I decided to try a splatter painting with daffodils as the main flower accented with purple pansies.

Splattered Paint Flower Art With Daffodil Doodles

I started with a 6×6 ampersand gesso board and painted the sky then splattered the green and let it dry. You can read more about my process and the paints and brush I use here. After it was dry I painted the daffodils using the 4 steps outlined above. I added stems with the bend characteristic of daffodils. Then I brushed on more leaves and added dabs of purple paint for the pansies and few little yellow centers. I also added a little brown for the dirt. To finish I splattered some yellow then purple paint.

If you want to read a charming book about daffodils you can read my review here.

I will be sharing this on Feathered Nest, Inspiration Gallery, Paint Party Friday, Savvy Southern Style. A Stroll Thru Life, StoneGable, Cozy Little House

The post Daffodil Doodles In 4 Easy Steps appeared first on My Flower Journal.

The New Koi Watercolor Pocket Set

$
0
0
The New Koi Watercolor Pocket Set

I love my new Koi Watercolor Pocket Set and the 30 colors it now includes. I have used my Koi set of 24 colors  for years for on the go or quick projects.Recently Sakura  added 6 new colors to their small, portable watercolor set without changing the size. Plus, it still includes a medium size water brush.

Color Chart for the Koi Watercolor Pocket Set

I made a color chart on a 4×6 watercolor postcard that I can keep with my set. It fits perfectly inside the lid. These are the colors in the order they are on the card. The ones with the (*) are the new colors. Starting with the top row:

Chinese White, Lemon Yellow, Aureoline Hue, Permanent Yellow*, Permanent Yellow Deep, Permanent Orange

Jaune Brilliant, Vermilion Hue, Cadium Red Hue, Crimson Lake, Quinacridone Rose, Purple

Cobalt Blue Hue, Cerulean Blue Hue, Ultramarine Deep, Turquoise Blue*, Prussian Blue, Indigo*

Permanent Green Pale* (replaced Yellow Green), Permanent Green*, Viridan Hue, Sap Green*, Olive Green

Yellow Ochre, Light Red, Burnt Umber, Sepia*, Payne’s Gray, Ivory Black

Practicing with the Koi Watercolor Pocket Set

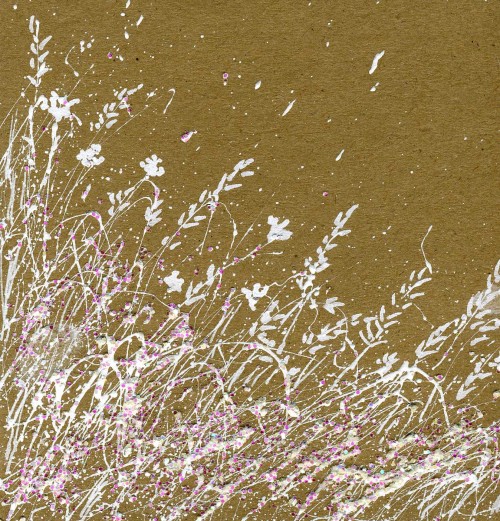
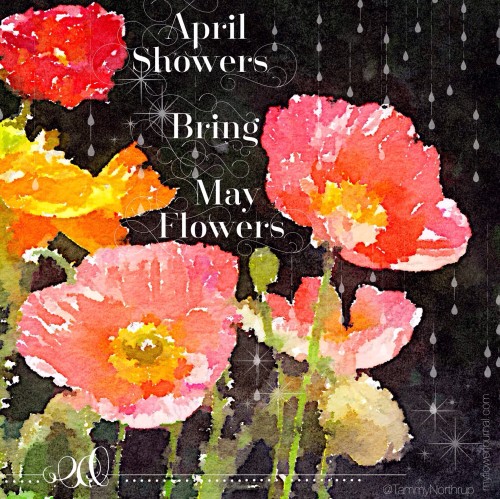
After I finished my my color chart I played with the colors and made some watercolor flower post cards. The tutorials for how I make my watercolor flowers can be found here and here. I love working on watercolor postcards. I like to practice new techniques or ideas on them. If I like how they turn out I can use them as cards or gift tags. The bright pretty colors in this set work well for painting flowers. There is  plenty of room for mixing colors. The removable tray can be placed on the left or right or even in the front of the paint colors. The lid can be used to mix colors or hold your color chart or a the watercolor postcard you are working on. Since the water brush fits inside you don’t need a lot of space to store your supplies for your on the go watercolor projects.

I will be sharing this on Feathered Nest, Inspiration Gallery, Savvy Southern Style. A Stroll Thru Life, StoneGable, Cozy Little House

The post The New Koi Watercolor Pocket Set appeared first on My Flower Journal.

Free Succulent Printable To Color

$
0
0
This is a great free succulent printable that you can color or paint. I used mine to make cards, but it would also look great framed. From myflowerjournal

Everybody is coloring these days as a way to relax and play with colors. On my daughter”s web site, Succulents and Sunshine, she has a free succulent printable that you can download, print, color and use for framed art, cards or postcards. 

How I Used The Free Succulent Printable from Succulents and Sunshine

  1. Download the Free Succulent Printable here.
  2. Print it on 4×6 paper of your choice. I used this photo paper and printed mine on this printer.
  3. I used the Koi Watercolor Set with 24 colors to paint mine. (Now I have a new Koi set with 30 colors. Read more about it here.) When using watercolor leave some white space for highlights. Remember watercolor dries lighter so keep your colors intense. Have a scrap of white paper nearby where you can test your colors and get them just right before you paint them on your card. Have fun mixing and trying new colors. You can use your imagination. Your succulents don’t have to look exactly like the ones you would buy at a nursery. Some succulents change colors depending on the season and weather. Be creative!
  4. When my succulent printable was dry I placed it on my ironing board, paint side down. Next I placed a piece of white copy paper on it then used a warm iron to flatten and smooth it. The photo paper I used took the water fairly well, but wrinkled a little bit as it dried. You may want to print yours on Mixed Media Paper then trim it to size. My printer wouldn’t print on watercolor postcards.
  5. I love working on the small 4×6 size. The small size makes it a quick and portable project. The finished piece can be framed in a standard 4×6 frame or used as a card or postcard.
  6. I attached my finished succulent art to a watercolor card using black photo corners. I love how the black photo corners gave it a nice finished look.I will be sharing this on Feathered Nest, Inspiration GallerySavvy Southern Style. A Stroll Thru Life, StoneGable, Cozy Little House

The post Free Succulent Printable To Color appeared first on My Flower Journal.

Watercolor Protea Bouquet

$
0
0
My watercolor Protea bouquet was inspired by the 31 Days of Flowers Challenge created by Brittany of from The House That Built. I love her free flower drawing video tutorials-myflowerjournal

Flower Drawing Challenge

I have had fun following the 31 days of Flowers challenge on the House That Lars Built. Each day during the month of May Brittany has shared a short video showing how to draw a type of flower. She also shares a few fun facts about each flower. I really enjoyed learning more about the Protea and Pincushion Protea. I have seen Proteas in arrangements and bouquets, but I didn’t know the name or much about it. After watching Brittany’s tutorials I drew a Protea bouquet then added watercolor to finish it. If you want to improve you flower drawing skills  you can watch her free tutorials on You Tube. Brittany also has a beautiful Flower Coloring Book. Some of the flowers she shows how to draw in this challenge are included in her book.

You can read about my favorite watercolors here and here.

The post Watercolor Protea Bouquet appeared first on My Flower Journal.

6 Heart Themed Art Tutorials

$
0
0
Take a look at myflowerjournal.com for 6 fun and easy heart themed art tutorials

I have compiled 6 of my heart themed art tutorials that you can use to create some fun and easy projects for Valentines Day. They are great activities for all ages. 

Click on each picture below for the tutorial.

The post 6 Heart Themed Art Tutorials appeared first on My Flower Journal.


Decorative Letters With Spattered Paint Flower Art

$
0
0
Such a fun tutorial on myflowerjournal.com that shows how to add splattered paint flower art to decorative letters.

There are so many ways you can use splattered paint flower art. This photo tutorial shows how you can splatter acrylic paint on decorative letters and turn it into flower art.

Supplies:

Decorative Letters (I bought mine at Hobby Lobby.)

Martha Stewart Acrylic Craft Paint or Golden Fluid Acrylics

Brush

Paper palette or paper plate to put paint on.

Decorative Letters With Splattered Paint Flower Art

  1. Lay your decorative letter on a protected surface and cover the top part of it with paper towel. (You can see my tips for set up and easy clean up here.) Splatter the bottom area with green acrylic paint. I have the most success with my splatter painting using the brush and fluid acrylic paint listed above. You can see a short video of how I splatter my paint here.
  2. Dab purple paint on some of the long splatters to look like delphiniums or larkspur. Keep your dabs light with white space in between.
  3. Next add some dabs of yellow and pink to look like small flowers. Mix a little white in and use a mix of lighter and darker pink and yellow to give the flowers dimension. This is an impressionistic style of painting. You are just giving the impression of flowers, not trying to make them look photo real.
  4. Use dark brown acrylic paint to add centers to the little pink and yellow flowers. Add some yellow green for some brighter leaves. You may want to add more greens at the bottom so your design looks grounded and doesn’t float. Look to see if it looks balanced. If not add more flowers or green leaves. Don’t fill it in too solid-leave some white space.

Here are some other color combinations you could try.

I’ll be sharing this on Savvy Southern Style.

The post Decorative Letters With Spattered Paint Flower Art appeared first on My Flower Journal.

Playing With Watercolors and Daniel Smith Dot Cards

$
0
0
Playing With Watercolors and Daniel Smith Dot Cards

Daniel Smith Watercolor Dot Cards

Daniel Smith Watercolor dot cards are such a fun and affordable way to play with watercolors and discover new colors. They are a great way for someone new to watercolors to try some professional quality paints without investing a lot of money initially. For those of us who have plenty of tubes of watercolors but are always looking for a new color the dot cards are a good way to test colors before spending $10 or more to buy a tube. More and more artists are discovering the rich colors and superb quality of the Daniel Smith watercolor brand. I have used a variety of watercolor brands over the years, but now use the Daniel Smith brand almost exclusively. I bought the dot cards a few years ago and have used them off and on to compare different paint colors. This is what the dot cards look like when you buy them. Small dabs of paint have been placed on watercolor paper to dry into dots. The name and details of each color is below the dot. I took this photo after I had tried a few colors so few have been wet with a drop of water, had a little color picked up with a brush then left to dry out. I recently saw an idea on Pinterest to turn the paint cards into swatches.

Making Swatches

I used a ruler and pencil to add grid lines to the dot cards. Then I used a brush and clean water to add a small drop of water to each color dot. I did about three rows at a time. After the paint had softened I used brush and painted a swatch of the color in each square. This was insightful in several ways. First I could see how the color reacted to water. Some colors just come alive with a drop of color. Others take a little more coaxing to cover the paper. Second I could see what the actual color was with more or less water added to it. Third I could tell how transparent or opaque the color was by how well I could read the printed name of it after I painted over it.

The dot cards looked so pretty after I was done! I wanted to keep them out where I could admire them. Even after going through this process there is still plenty of paint to use for small projects or to play with the color combinations.

Splattered Paint Cards With Watercolor Flowers

I usually have some watercolor cards or gift tags that are splattered with acrylic paint on hand for when I need an easy, relaxing project. I used some of these cards with splattered paint and added watercolor flowers using the paint on the Daniel Smith dot cards. Look how many pretty flower colors there are too choose from!

These are some of the cards I painted using the dot cards. I could do many many more cards from the remaining paint dots. Some colors have smaller dots of paint than others, but there are so many to choose from you could paint many small watercolors from one set of Daniel Smith Dot cards. This is why they are so good for someone new to watercolors. They could try a lot of different colors before investing in tubes of paint. I currently use the Daniel Smith Essential Six plus a few more of my favorite colors like sap green and cobalt teal.

So if you want to play with lots of color or need a good gift for someone new to watercolors give the Daniel Smith Watercolor dot cards a try.

Splattered Paint Flower Art

Learn more about how I splatter paint and turn it into flower art by clicking on a picture below.

The post Playing With Watercolors and Daniel Smith Dot Cards appeared first on My Flower Journal.

Using Flower Photos for Splattered Paint Art Inspiration

$
0
0
I love to take photos of flowers everywhere I go! I took this photo in my friends garden and have used it many times as inspiration for my splattered paint flower art-myflowerjournal.com

Using Flower Photos for Splattered Paint Art Inspiration

Everywhere I go I am always looking for inspiration for my splattered paint flower art and other flower art projects. I turn to my collection of flower photos often to give me ideas for my art. Taking flower photos when we are on vacation or exploring beautiful places near home is one of my favorite things to do. Thousands of my flower photos are stored on my computer, but I am always looking for more flowers or gardens to take pictures of.

Creating flower art using a splattered paint background is an impressionistic style of painting. I am not making a exact copy of a photo or landscape. I look for gardens I can photograph that will give me ideas of colors and textures I can add to my art to make it look like a field of wildflowers or a border of perennials in a cottage garden.  My iPhone is the camera that is always with me so I use it for all my photos.

Tips for taking flower photos for flower art inspiration.

  1. Step back and take a photo showing the whole garden.
  2. Move in close and take photos of individual flowers at different angles.

The photo below is one I took at The Ashton Gardens at Thanksgiving Point in Lehi, Utah. I refer to it often. It captures the look I am trying to create in my splattered paint flower art.  I love the colors and variety of flowers in it.

This photo is one I took in a friends garden. I have used the close up view many times as I have added delphiniums and poppies to my splattered paint backgrounds.

6×6 watercolor on watercolor paper with splattered acrylic paint

You can learn how I created my splattered paint flower art and the supplies I use here.

More Flower Photos and Splattered Paint Flower Art

Here are more of my flower photos that give me inspiration for the flowers I add to my splattered paint art.

Watercolor roses on mixed media paper with splattered acrylic paint.

Follow me on Instagram for more flower art ideas.

The post Using Flower Photos for Splattered Paint Art Inspiration appeared first on My Flower Journal.

Paint Splatters With Flowers All Over

$
0
0
How to add watercolor flowers to paint splatters to create splattered paint flower art-myflowerjournal.com

Something New!

I tried something new a few weeks ago and it worked! I loaded a brush with acrylic craft paint and splattered it all over mixed media paper in lots of different directions. When the paint dried I added watercolor flowers. I love this new way to create splattered paint flower art! It has so many possibilities and it doesn’t matter if you have long paint splatters or little specks. It all works!

Paint Splatters

Start with piece of mixed media or watercolor paper . You can add masking tape or blue painters tape if you like a nice white border for your finished art. Next splatter acrylic paint in lots of different directions. You can learn more about my splattered paint art, the brush I use and watch of short video of me splattering paint here.

Watercolor Flowers

After the acrylic paint dries its time to have fun and start adding flowers. You can pull ideas from your head or look at photos to get started. I have nice collection of flower photos from vacations and outings close to home I often refer to. I like to use Daniel Smith Watercolors or this Koi set by Sakura. Keep adding flowers and leaves until you feel like your flower art is finished.

6×6 mixed media paper with watercolor flowers and splattered acrylic paint

Why I Love Paint Splatters!

Sometimes when I look at a piece of blank watercolor paper I can’t decide where to start or what to paint. Acrylic paint splatters give me something to start with. It also helps me to let go and be creative filling the spaces between the splatters with flowers and color.

6×6 mixed media paper with watercolor flowers on splattered acrylic paint

On this last design I got brave at the end and filled in around the flowers with some color!  If you do add color to the background make sure the flowers are dry so the color doesn’t bleed.

Happy Splattering!


Follow me on instagram for more flower art ideas.

The post Paint Splatters With Flowers All Over appeared first on My Flower Journal.

White Gel Pen Magic On Watercolor!

$
0
0
White Gel Pen Magic on Watercolor Flowers and splattered acrylic paint from myflowerjournal.com

white gel pen can work like magic on a finished watercolor when you need a few highlights. Traditionally when working in watercolors you leave the white of the paper showing when you have a white object or highlights. Sometimes when you paint with watercolor things don’t go as planned and the white space you planned to leave disappears. That is when a white gel pen is a great tool to have!

My Favorite White Gel Pen

I have tried many different white gel pens, but have found the Uni-ball Signo white gel pen to be my favorite. Other brands of gel pens seem to dry out or quit working when they aren’t used very often. I can usually count on the Uni-ball Signo to work every time I need it.

White Highlights

When you just need a touch of white or highlight a gel pen can be an easy way to get the look you want.

I was happy with how these watercolor flowers on splattered acrylic paint turned out, but wanted a few more white highlights.

So I added a few lines with my white gel pen. Its subtle, but it gives it a little more sparkle.5×5 watercolor on splattered acrylic paint

Here I used my white Uni-ball Signo Gel Pen to add some of the needles to this Prickly Pear Watercolor painting.5×7 watercolor

In this painting I used my white gel pen very lightly to add detail to the windows of the cottage and some white flowers and highlights in the garden.5×7 watercolor

Next time you need a little more white in your watercolor painting try using a white gel pen to add a nice finishing touch.

The post White Gel Pen Magic On Watercolor! appeared first on My Flower Journal.

Viewing all 30 articles
Browse latest View live


Latest Images